Convert Photos into Stunning 3D Crystal Engravings

How to Use CrystalMe3D Pro (Step-by-Step Guide)

This guide explains how to use CrystalMe3D Pro to convert photos into detailed, engraving-ready designs for crystal engraving machines. You can also watch our video for a quick walkthrough of how it works.

1. Install The Software

Follow the prompts to install the software. You will need your email and license key upon first start.

(Your license key was emailed to you upon purchase.)

2. Enter Your License Info

Upon first startup, you will be asked to enter your license key and email address.

Your license key was emailed to you upon purchase but you can also find it under your “My Account” page under Licenses.

3. Load An Image

Click on the “Load Image” button in the top left to load your image. Alternatively, you could use the file menu -> load image.

(Use can load a .jpg, .jpeg, .png, .bmp, .tiff,) 

4. Set Your Crystal Size

Set the dimensions of your crystal block.

(This will be displayed in the preview window)

5. Remove Background (If Needed)

Click on the “Remove Background” checkbox to automatically remove the background. You can make additional adjustments if needed using the edit mask feature. (Step 7.)

6. Apply Crop (If Needed)

You can use the crop tools at the top if you need to crop the subject(s).

Click the “Crop” button and then left click and drag over the left preview window to draw a box. After your box has been set, click on the “Apply Crop” button.

7. Apply/Edit Mask (If Needed)

Click the Edit Mask checkbox if you need to add/remove certain areas of the images. Use the left preview window to paint over the areas you wish to mask. When finished, be sure to click on “Apply Edits” for the changes to take affect.

8. Preview 3D Points

Use the “Preview 3D Points” button to bring up the 3D preview window.

(You can leave that window open while making any adjustments.)

9. Make Any Adjustments (If Needed)

Use the slider controls to make any adjustments to the 3D Point Cloud.

You’re in complete control on how the final model looks. Small changes can make a big difference on the output. You can always click on the “Reset Defaults” button at the top if you need to start over.

TIP: Use the “Auto Tune” button first to auto adjust the sliders. You may still need to manually adjust the sliders for optimal results.

10. Enlarge Preview

You can increase the size of the preview window, move it around, or make it full screen at any time if needed. Use your mouse to pan around the model to view different angles. Scrolling with the mouse wheel will zoom in and out.

TIP: If you have dual monitors, you can set the preview window to your other screen for easier viewing.

11. Export The Model

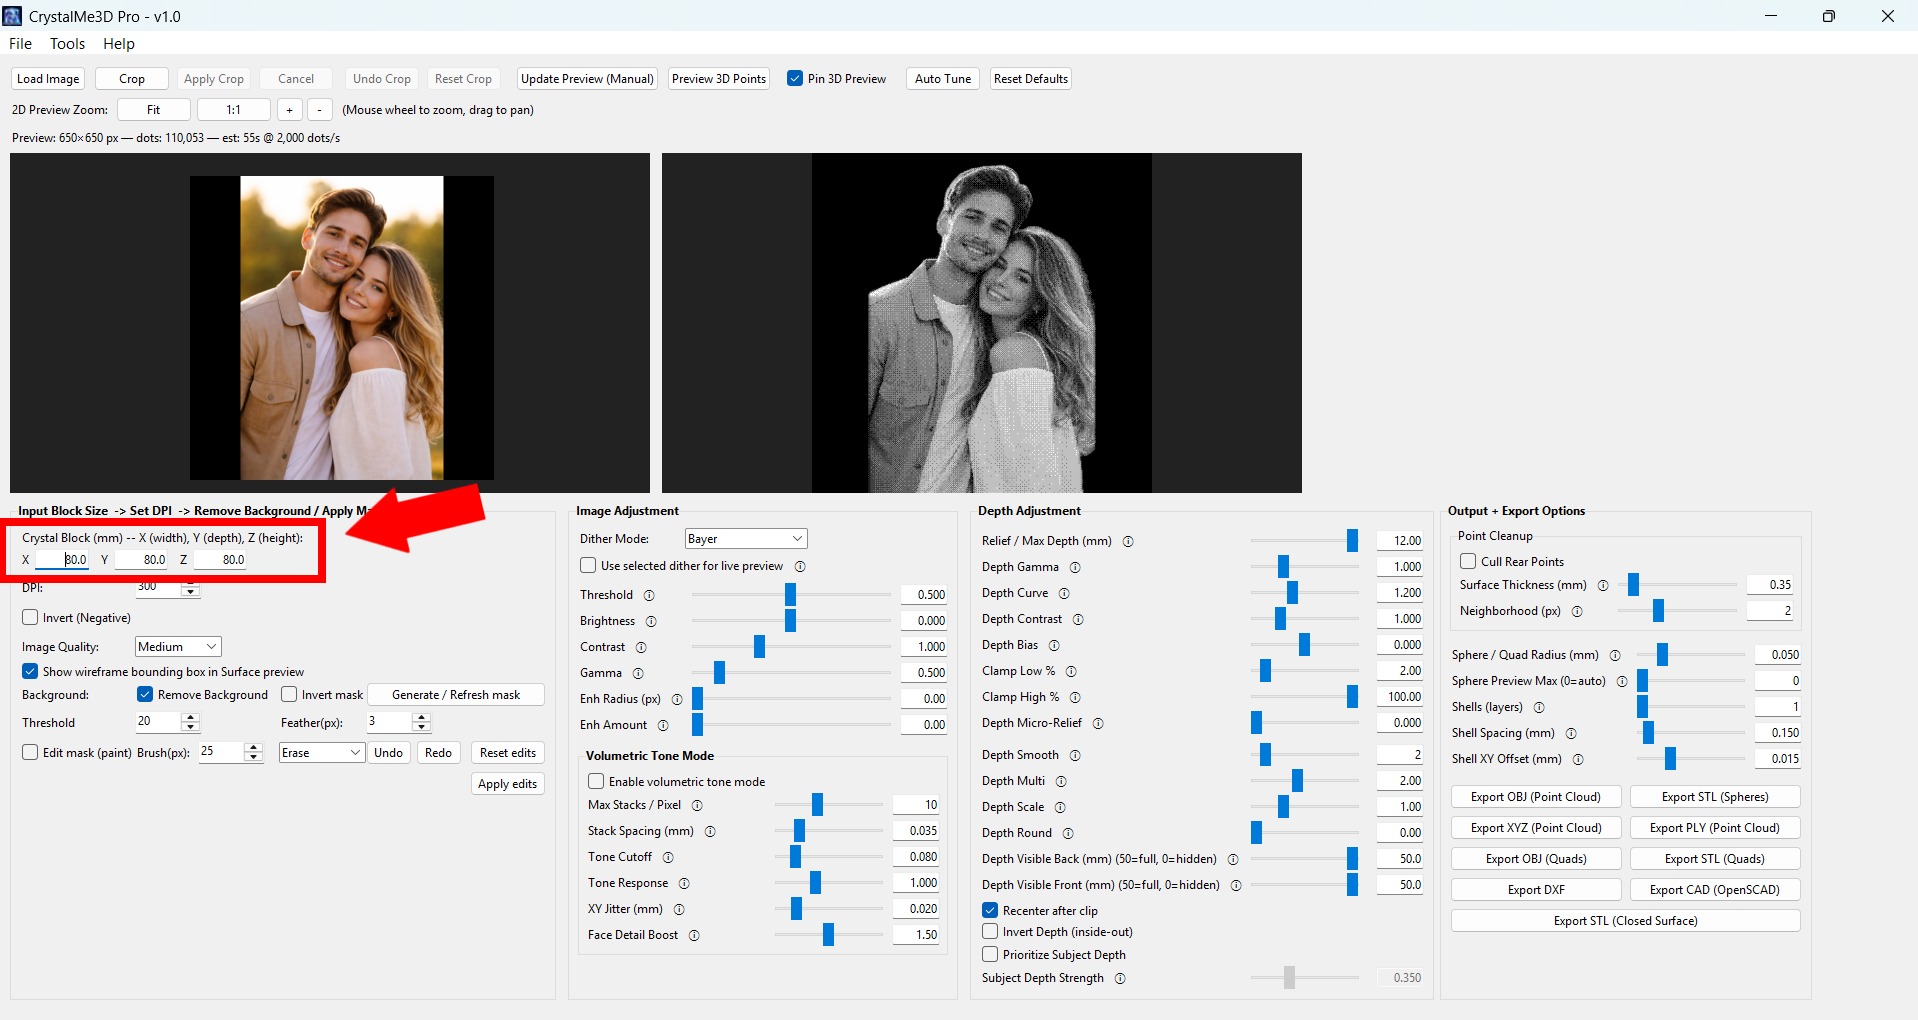
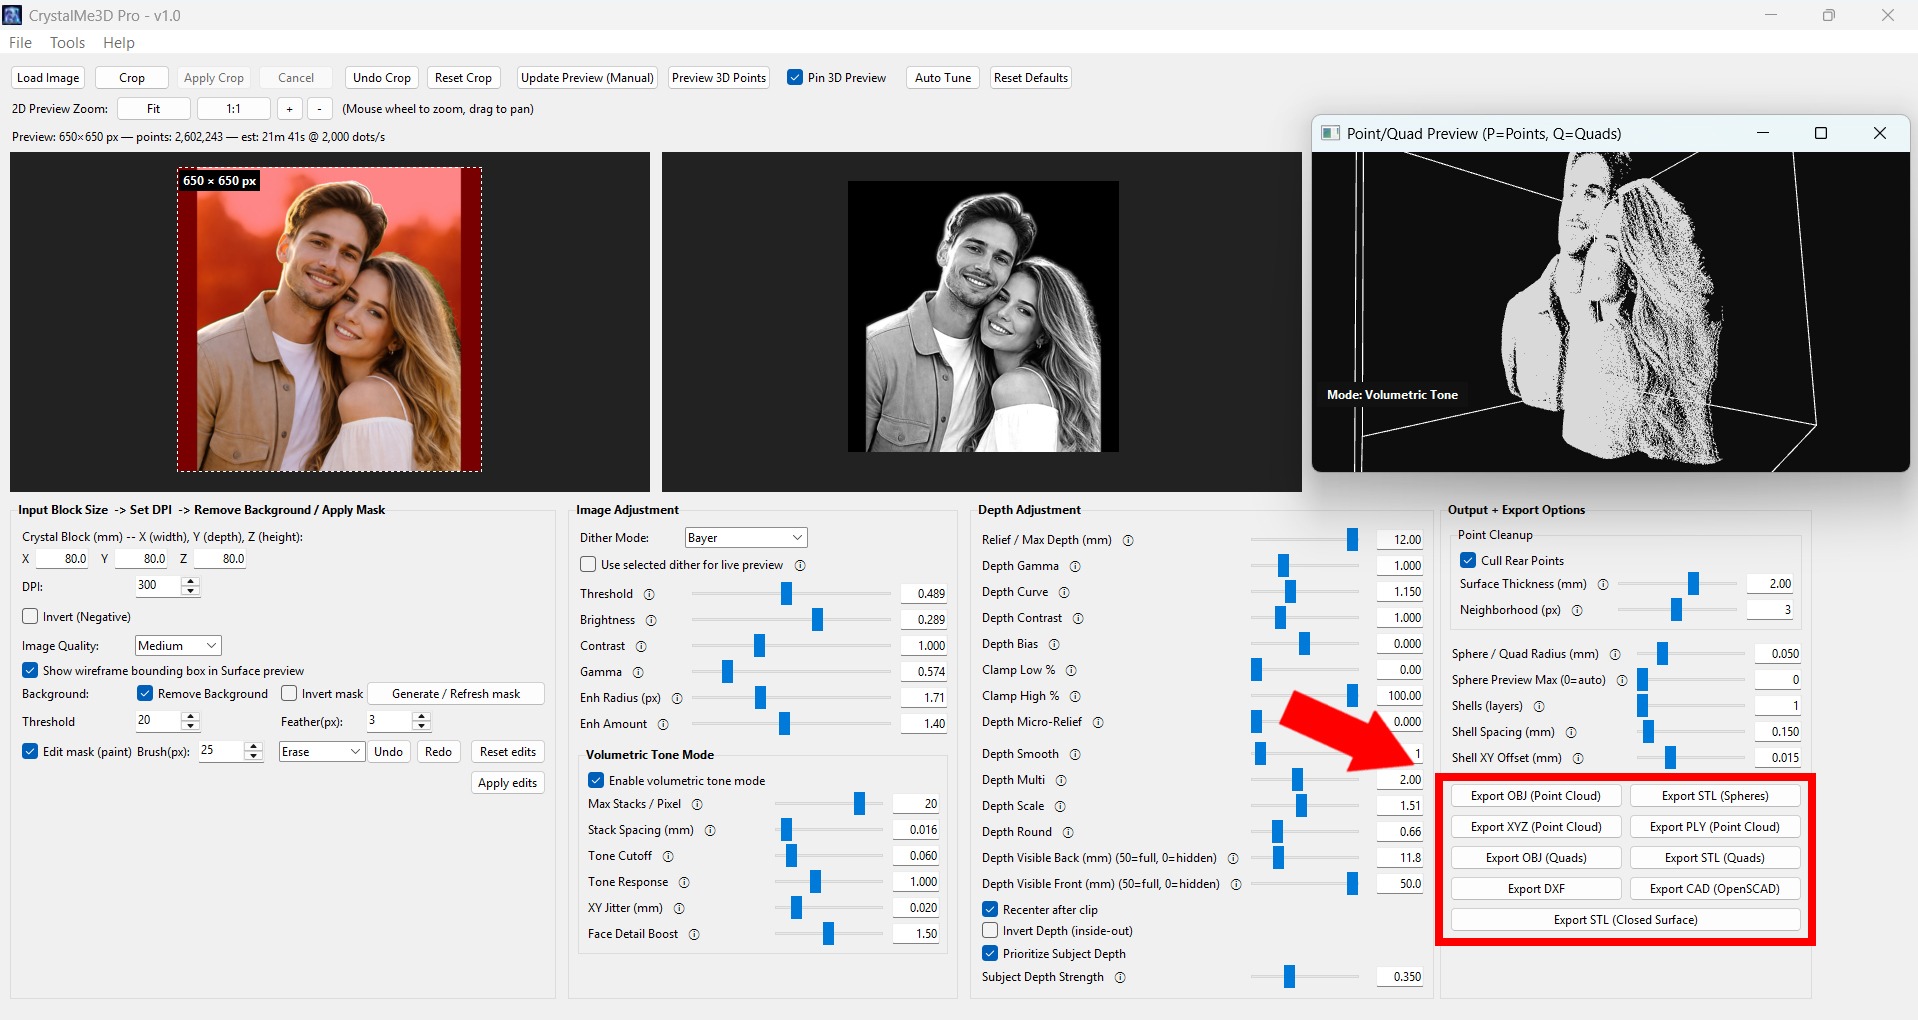
Use the Export Options in the right panel to export your file in whatever format works best for your machine.

You can choose from .OBJ, .STL, .SCAD, .PLY, .XYZ, .DXF. 

You can also choose to export the solid .STL which could be used for 3D Printing or CNC machining.

Additional Tips

  • You can save your project file at any time if you need to return to it later.
  • You can use the “Auto Tune Depth” button to quickly set up recommended settings. (Additional adjustments may be necessary)
  • In the File menu, you can also export the Dither PNG, the Depth Map PNG, or the Mask PNG.
  • In the Tools menu, you can preview the 3D surface at any time to visually see the depth map.
  • For best results, we recommend using high quality images. (Blurry or low resolution images may produce poor results)
  • For brighter results, use the Volumetric Tone Mode. 
  • What you see in the preview window is how it will export so be sure to click on “Update Preview” one last time just to make sure your settings are correct.