The quality of a 3D crystal engraving depends heavily on the photo you start with. Choosing a good photo for crystal engraving is one of the most important factors in achieving a detailed and realistic final result. Even the most advanced software cannot fully compensate for a poor-quality image.
If you want sharp detail, realistic depth, and professional results, selecting the right photo is critical.
In this guide, you will learn what makes a good photo for 3D crystal engraving, what to avoid, and how to improve your images for the best possible outcome.
Why Photo Quality Matters in 3D Crystal Engraving
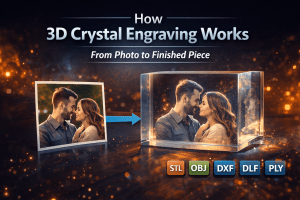
3D crystal engraving works by converting a 2D image into a depth-based point cloud. Every detail in the final engraving is derived from the original photo. If you want a full breakdown of this process, see our guide on how 3D crystal engraving works.
If the image lacks clarity, contrast, or proper lighting, the engraving may appear flat, unclear, or missing important details.
High-quality input images allow software like CrystalMe3D Pro to generate smoother depth transitions and more realistic results.
1. Clear Subject Focus
The most important element of any engraving is the subject. It must be clearly visible and easy to distinguish from the background.
Best types of images include:
- Portraits with a single subject
- Close-up images with clear facial features
- Photos where the subject(s) fills most of the frame
Images to avoid include:
- Group photos with too many people
- Subjects that are far away or too small
- Images with distracting elements around the subject
A strong subject focus ensures the engraving looks clean and detailed.
2. Good Lighting
Lighting plays a major role in how well depth can be interpreted from an image.
Ideal lighting conditions include:
- Even lighting across the subject
- Natural daylight or soft studio lighting
- Balanced highlights and shadows
Poor lighting conditions to avoid:
- Harsh shadows that hide details
- Overexposed areas with lost detail
- Very dark images with limited visibility
Good lighting helps preserve detail and allows depth mapping to produce more accurate results.
3. Strong Contrast
Contrast helps define edges and features within the image, making it easier to translate into a detailed engraving.
A high-quality image should have:
- Clear separation between light and dark areas
- Well-defined facial features
- Visible textures and edges
Low-contrast images often result in flat or washed-out engravings with limited detail.
4. Simple Background
Background complexity can significantly affect the clarity of the final engraving.
Best practices for backgrounds:
- Use simple or blurred backgrounds
- Keep focus on the subject
- Remove unnecessary distractions
Busy backgrounds can introduce unwanted noise and reduce the overall quality of the engraving.
5. High Image Resolution
Higher resolution images produce more detailed engravings. The more pixel data available, the more accurately the software can generate depth and fine detail.
Recommended guidelines:
- At least 1000 pixels or more on the main subject
- Higher resolution for larger crystal sizes
- Avoid heavily compressed or pixelated images
Low-resolution images can still be used, but detail will be limited and may appear soft in the final result.
6. Why Depth Matters
3D crystal engraving relies on depth perception to create a realistic image inside the crystal.
Software like CrystalMe3D Pro analyzes the image and assigns depth values to different areas, creating a layered 3D structure.
Images with clear lighting, contrast, and subject definition allow for more accurate depth generation, resulting in a more lifelike engraving.
7. How to Improve Your Photo Before Engraving
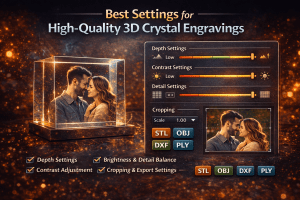
Even if your image is not perfect, there are several ways to improve it before processing. To get the best final results, it’s also important to dial in your processing settings. See our guide on the best crystal engraving settings.
Simple adjustments include:
- Cropping to focus on the subject
- Adjusting brightness and contrast
- Removing or simplifying the background
- Enhancing sharpness carefully
These improvements can significantly enhance the final engraving quality.
Common Mistakes to Avoid
- Using blurry or low-quality images
- Choosing photos with poor lighting
- Using images with busy or distracting backgrounds
- Ignoring contrast and detail levels
- Not cropping the subject properly
Avoiding these mistakes will help ensure consistent, high-quality results. For more details, see our guide on common 3D crystal engraving mistakes and how to avoid them.
Examples of Good vs Poor Photos
Good photo characteristics:
- Sharp focus on the subject
- Even lighting with visible detail
- Simple background
- Strong contrast
Poor photo characteristics:
- Blurry or pixelated image
- Dark or overexposed lighting
- Cluttered background
- Low contrast and weak detail
Conclusion
A great 3D crystal engraving starts with a high-quality photo. Clear subjects, proper lighting, strong contrast, and good resolution all contribute to a better final result.
By selecting the right images and making simple improvements, you can significantly enhance engraving quality.
Combined with specialized software like CrystalMe3D Pro, this allows you to consistently produce sharp, detailed, and professional 3D crystal engravings.